


Verify Smart Contracts using Dijets Utility Chain Explorer
Once verified, a smart contract or token contract's source code becomes publicly available and verifiable. This creates transparency and trust between the developer of the smart contract or a DApp and users who interact with the said contract/DApp.
After deploying a smart contract one can verify it easily on Dijets Explorer in three steps:
- Flatten the Smart Contract
- Clean up the flattened contract
- Verify using the Dijets Explorer GUI
Flatten a Smart Contract using Hardhat#
info
Flattening a smart contract refers to combining all Solidity code in one file instead of multiple source files such that, instead of having imports, the imported code is all embedded in the same file.
To flatten the smart contract code run the command:
npx hardhat flatten <path-to-contract> >> <flat-contract-name>.sol
Clean up the flattened Smart Contract#
Some clean-up may be necessary to get the code to compile properly in the Dijets Explorer Contract Verifier
-
Remove all but the top SPDX license.
- If the contract uses multiple SPDX licenses, use both licenses by adding AND for example:
SPDX-License-Identifier: MIT AND BSD-3-Clause
- If the contract uses multiple SPDX licenses, use both licenses by adding AND for example:
Verify the Smart Contract using Dijets Explorer#
- Search for the contract in Dijets Explorer
- Click on the contract address. Your contract details should come up.
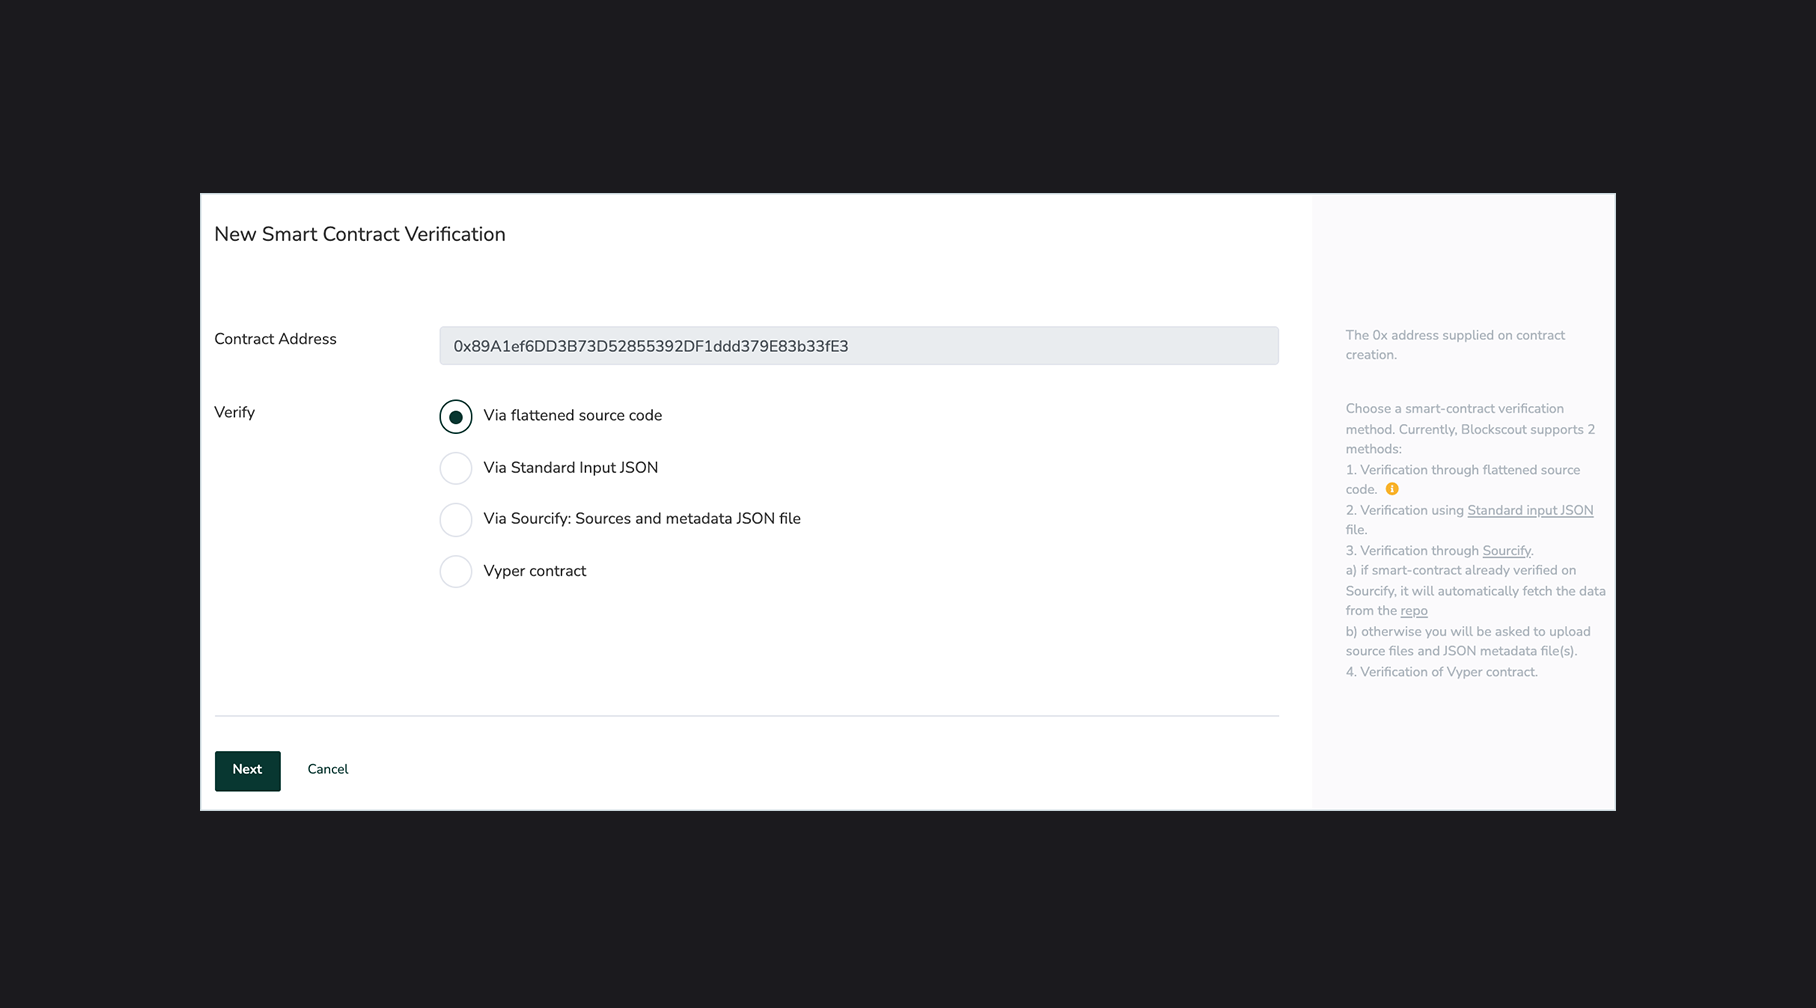
- Select the Code tab to view the bytecode, click the Verify & Publish button. You will see several options for verification.
- Via flattened source code (Solidity)
- Via standard JSON input
- Via Sourcify: Sources and metadata JSON file
- Vyper Contract
Via Flattened Source Code#
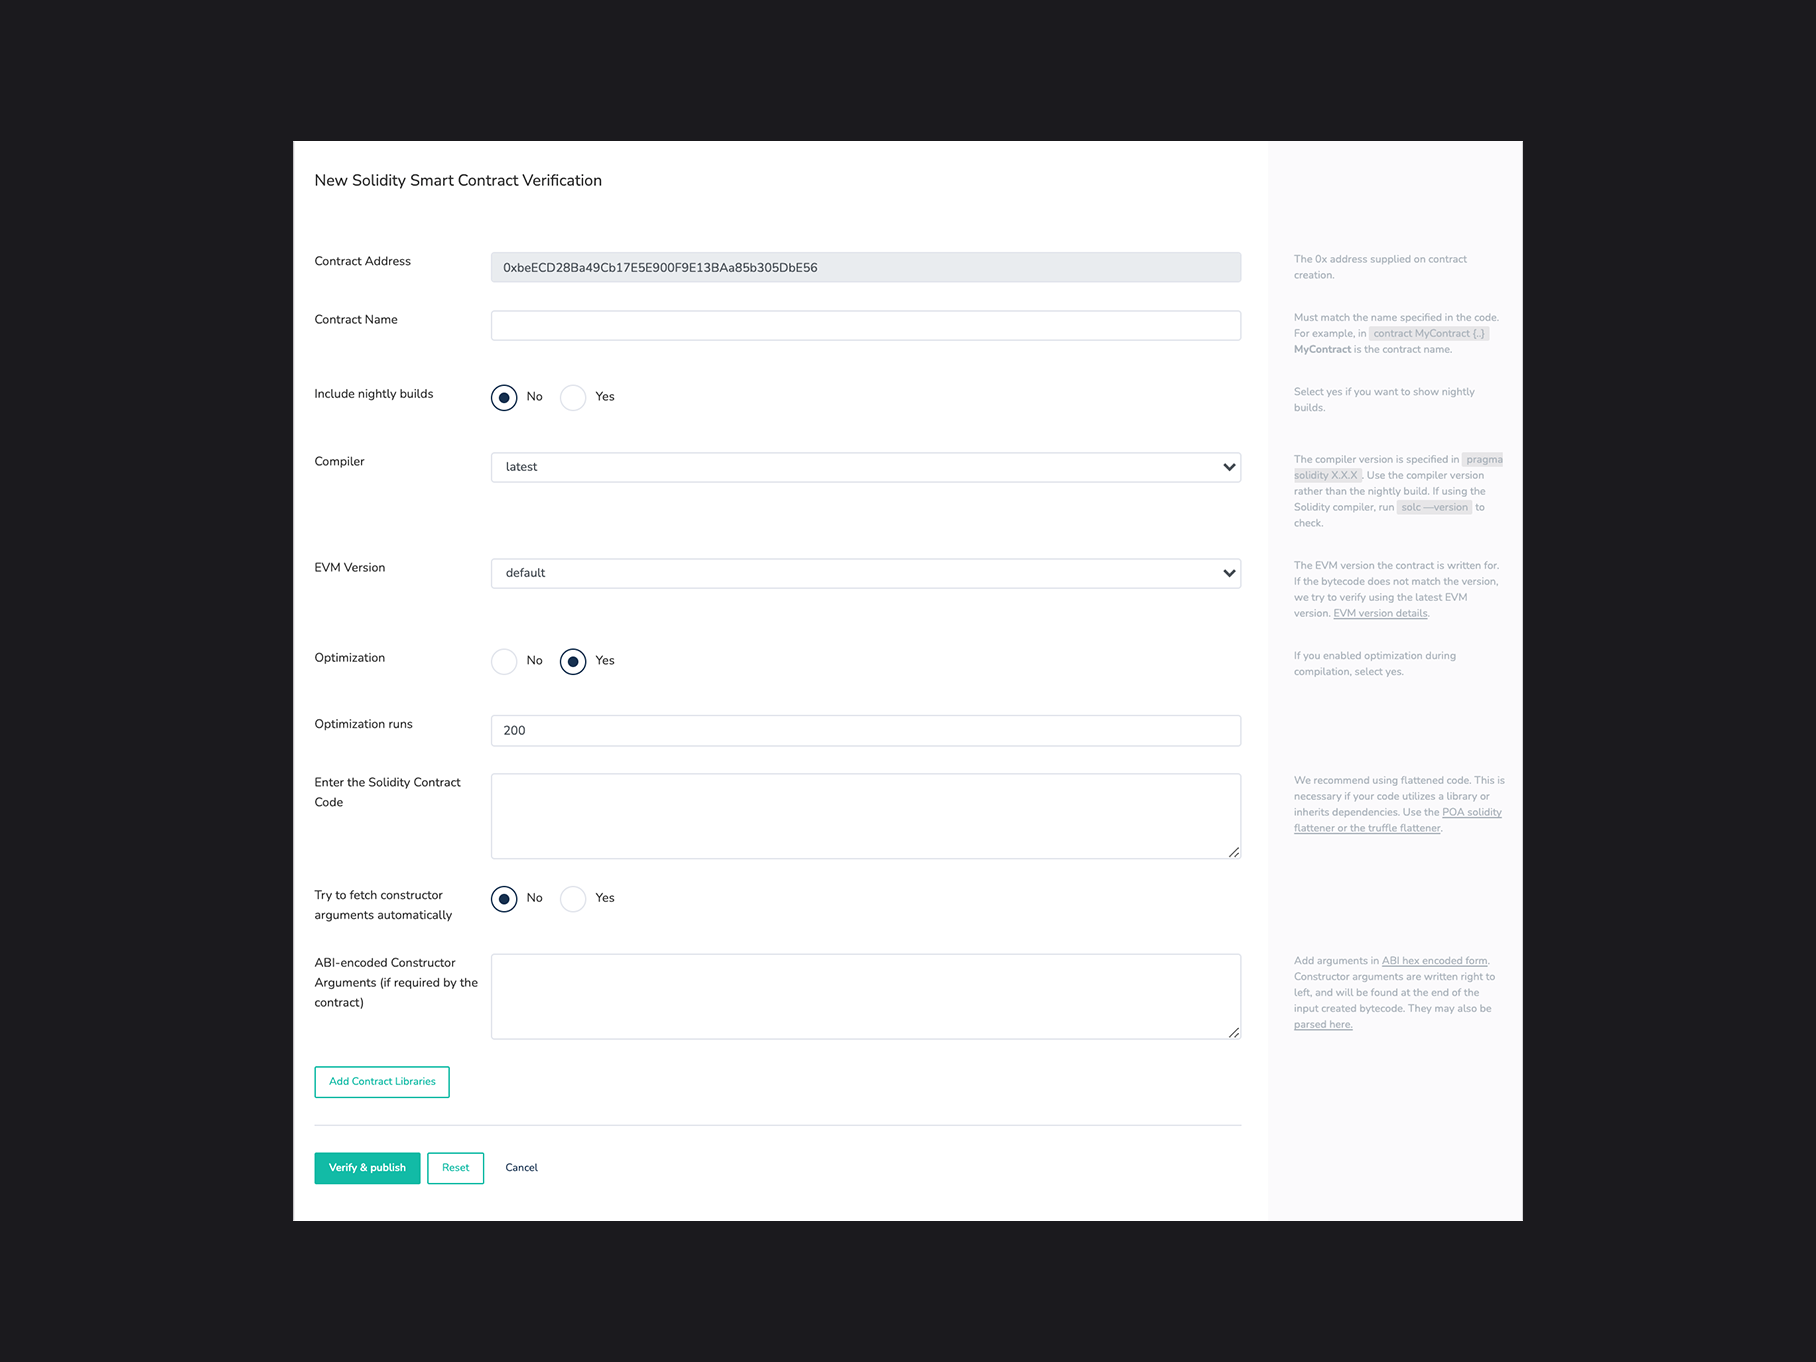
Below is the list of all the options and their inputs for the information query form you will see on your screen if you choose to verify your contract via Flattened source code.
- Contract Address: The
0xaddress supplied on contract creation. - Contract Name: Name of the class whose constructor was called in the .sol file. For example, in
contract MyContract {..MyContract is the contract name. - Include Nightly Builds: Yes if you want to show nightly builds.
- Compiler: derived from the first line in the contract
pragma solidity X.X.X. Use the corresponding compiler version rather than the nightly build. - EVM Version: See EVM version information
- Optimization: If you enabled optimization during compilation, check yes.
- Optimization Runs: 200 is the Solidity Compiler default value. Only change if you changed this value while compiling.
- Enter the Solidity Contract Code: Enter the flattened & cleaned up smart contract code we generated earlier with hardhat.
- Try to fetch constructor arguments automatically: If similar contracts exist these may be available.
- ABI-encoded Constructor Arguments: See this page for more info.
- Add Contract Libraries: Enter the name and 0x address for any required libraries called in the called in the .sol file.
- Click the
Verify and Publishbutton. - If all goes well, you will see a checkmark :white_check_mark: next to Code in the code tab, and an additional tab called
Read Contract. The contract name will now appear in BlockScout with any transactions related to your contract.
Via standard JSON input#
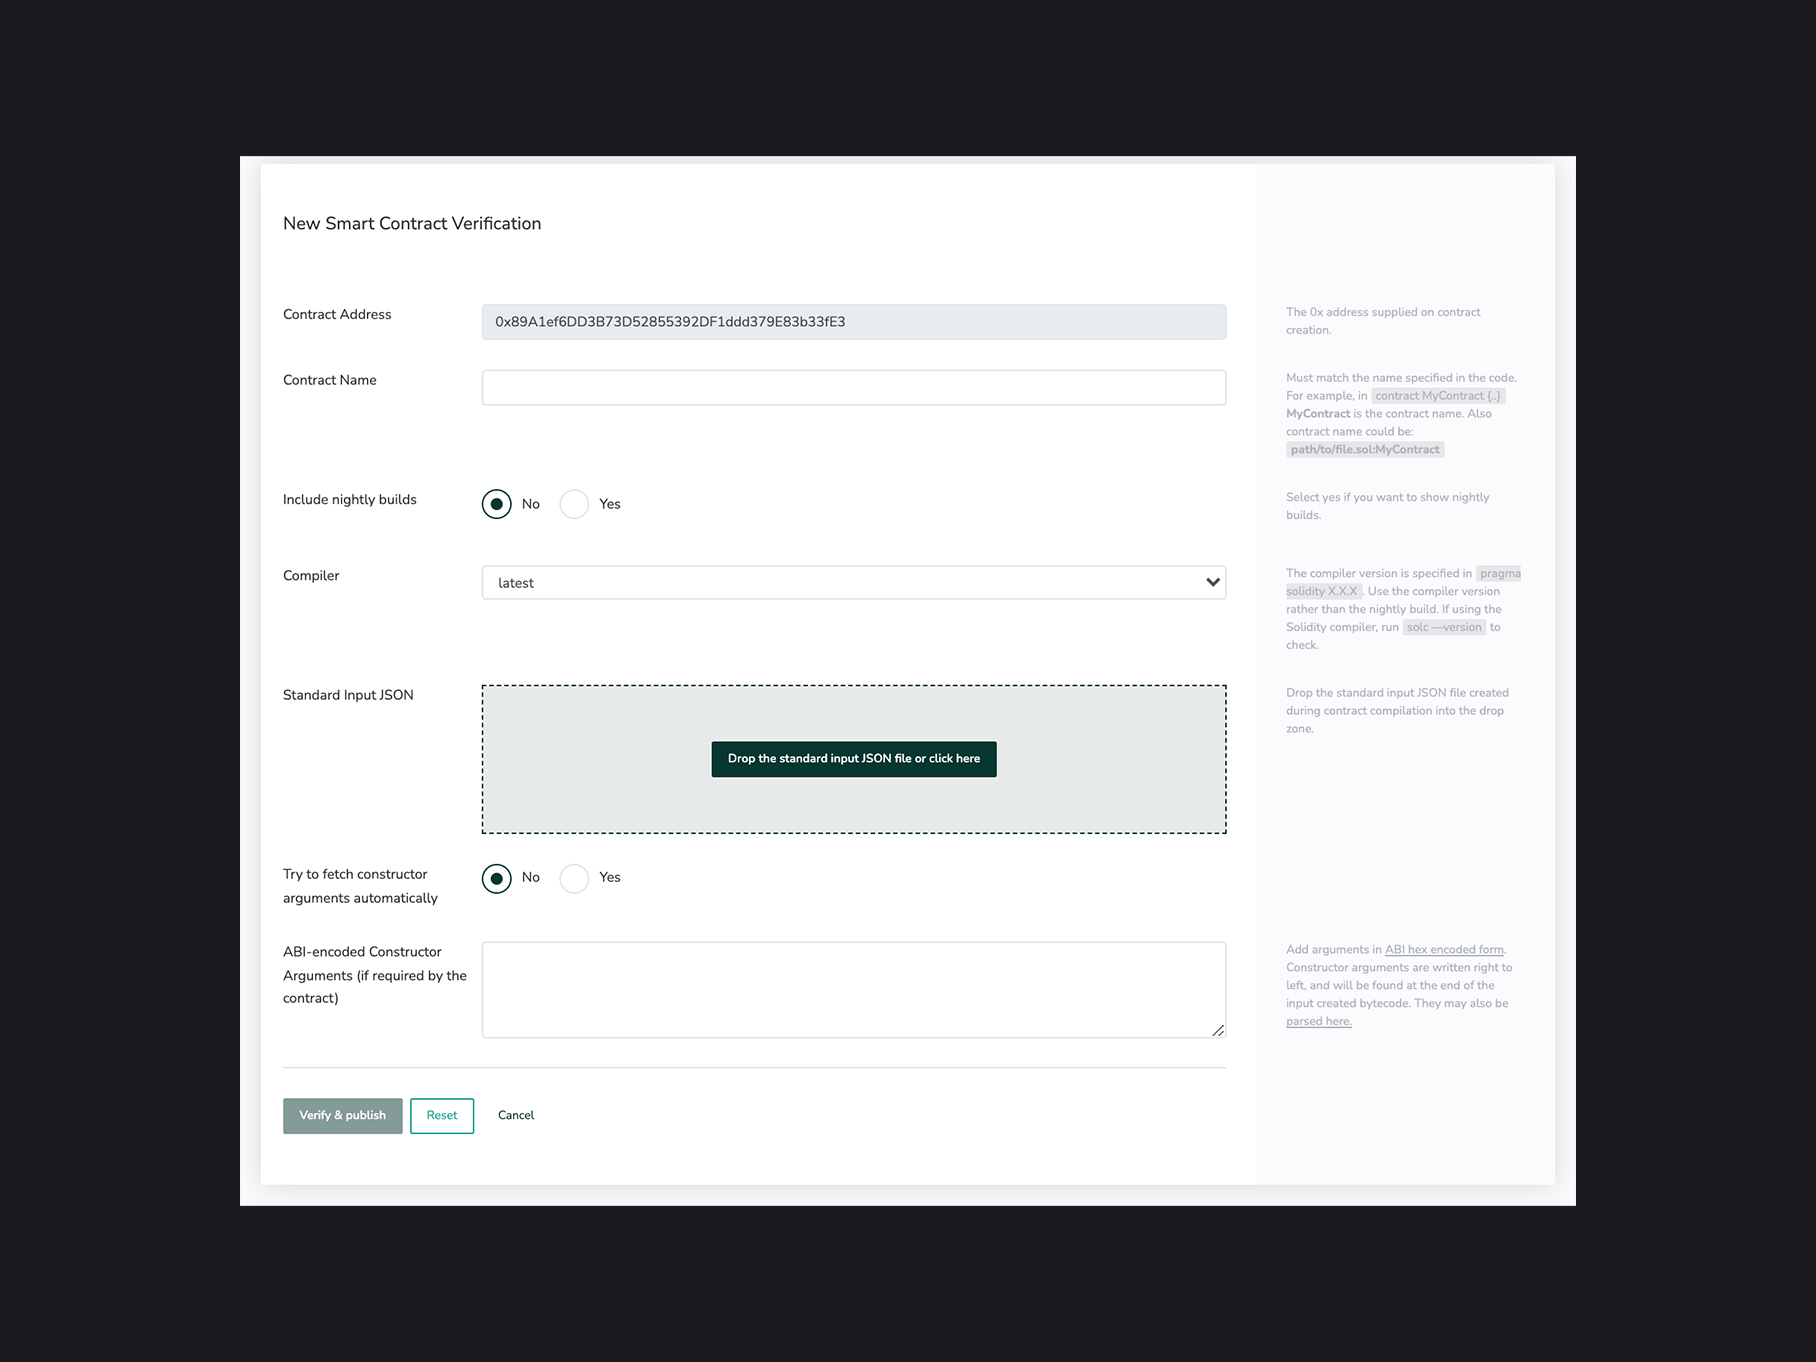
Below is the list of all the options and their inputs for the information query form you will see on your screen if you choose to verify your contract via Standard Json Input.
- Contract Name. There are several options:
- Leave blank.
- Enter contract name:
MyContract. - Enter path to the contract and it's name:
path/to/file.sol:MyContract(path should match what is written in your JSON file).
- Include nightly builds. You can choose Yes or No depending on your compiler.
- Compiler. Choose the compiler version used to compile your smart contract.
- Standard Input JSON. Attach your Standard Input JSON file. File should follows solidity format and all the sources must be in Liternal Content format, not an URL.
- Try to fetch constructor arguments automatically. Select No if you want to provide ABI-encoded Constructor Arguments or the contract does not have any.
- ABI-encoded Constructor Arguments. Fill it with ABI-encoded Constructor Arguments or leave blank.
After filling the form click the Verify & publish button and wait for the response.
Via Sourcify: Sources and metadata JSON file#
See the Contract Verification via Sourcify page for details.
Vyper Contract#
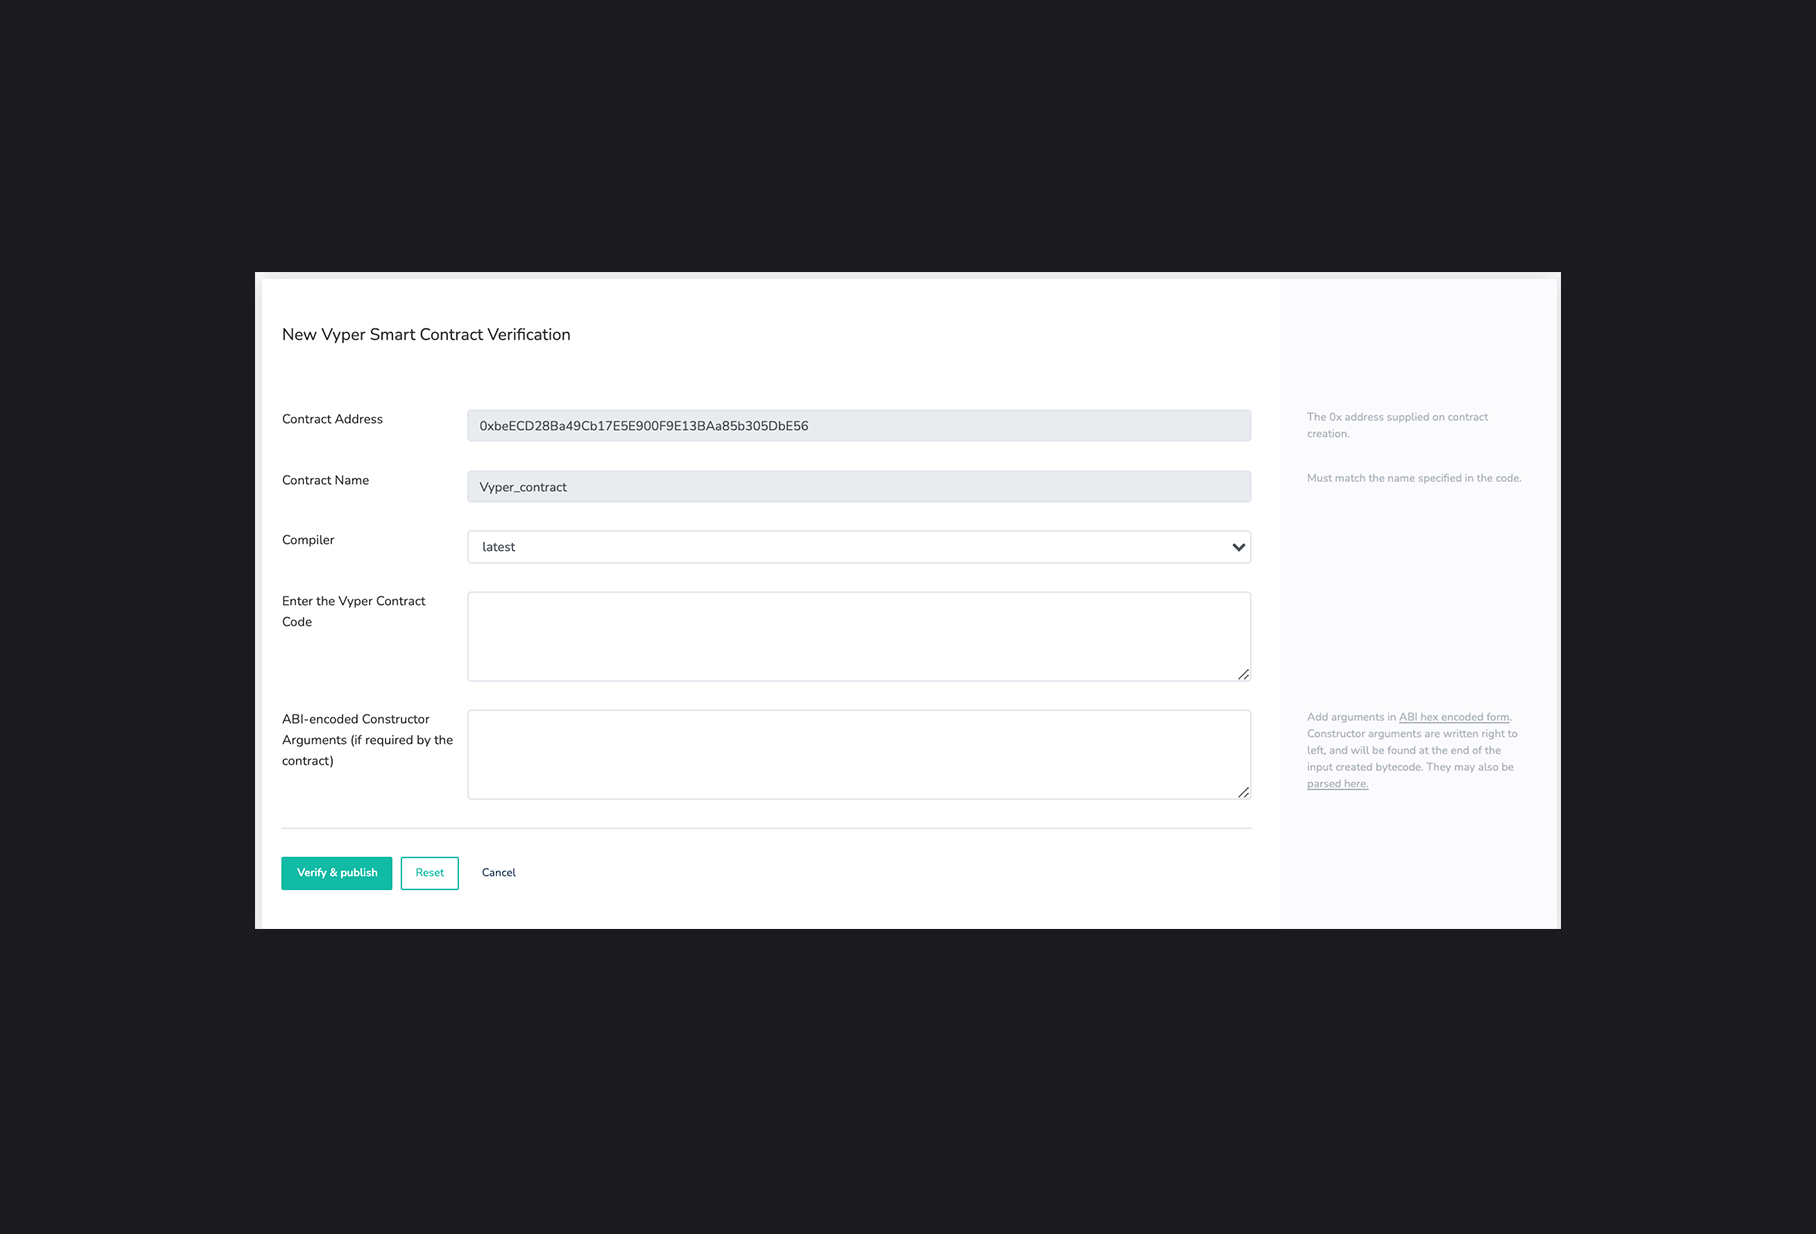
Below is the list of all the options and their inputs for the information query form you will see on your screen if you choose to verify your contract via Vyper.
- Contract Address: The
0xaddress supplied on contract creation. Should autopopulate - Contract Name: Should autopopulate
- Compiler: Select the compiler version used in the source code.
- Enter the Vyper Contract Code: Copy and paste the contract code
- ABI-encoded Constructor Arguments (if required): See this page for more info.
- Click the
Verify and Publishbutton. - If all goes well, you will see a checkmark :white_check_mark: next to Code in the code tab, and an additional tab called
Read Contract. The contract name will now appear in BlockScout with any transactions related to your contract.
Troubleshooting#
If you receive the dreaded There was an error compiling your contract message this means the bytecode doesn't match the supplied sourcecode. Unfortunately, there are many reasons this may be the case. Here are a few things to try:
-
Double check the compiler version is correct.
-
Check that an extra space has not been added to the end of the contract. When pasting in, an extra space may be added. Delete this and attempt to recompile.
-
Copy, paste and verify your source code in Remix. You may find some exceptions here.
